
Managing A Store Locator WordPress Plugin
A Store Locator premium plugin (ASL) is a WordPress tool that helps you display and manage multiple store locations on your website. It typically includes features such as searchable maps, location filters, and detailed store information, making it easier for customers to find the nearest branch or service point.
This guide explains how to create and edit store locations in the Store Locator WordPress plugin. It is designed to help you manage store details quickly and accurately.
1. Manage Existing Stores
1.1. A Store Locator Plugin navigation
The ASL plugin is always visible on the WordPress Dashboard on the side navigation bar. You will mainly use the 'Add New Store', 'Manage Stores', and 'Manage Categories' options.
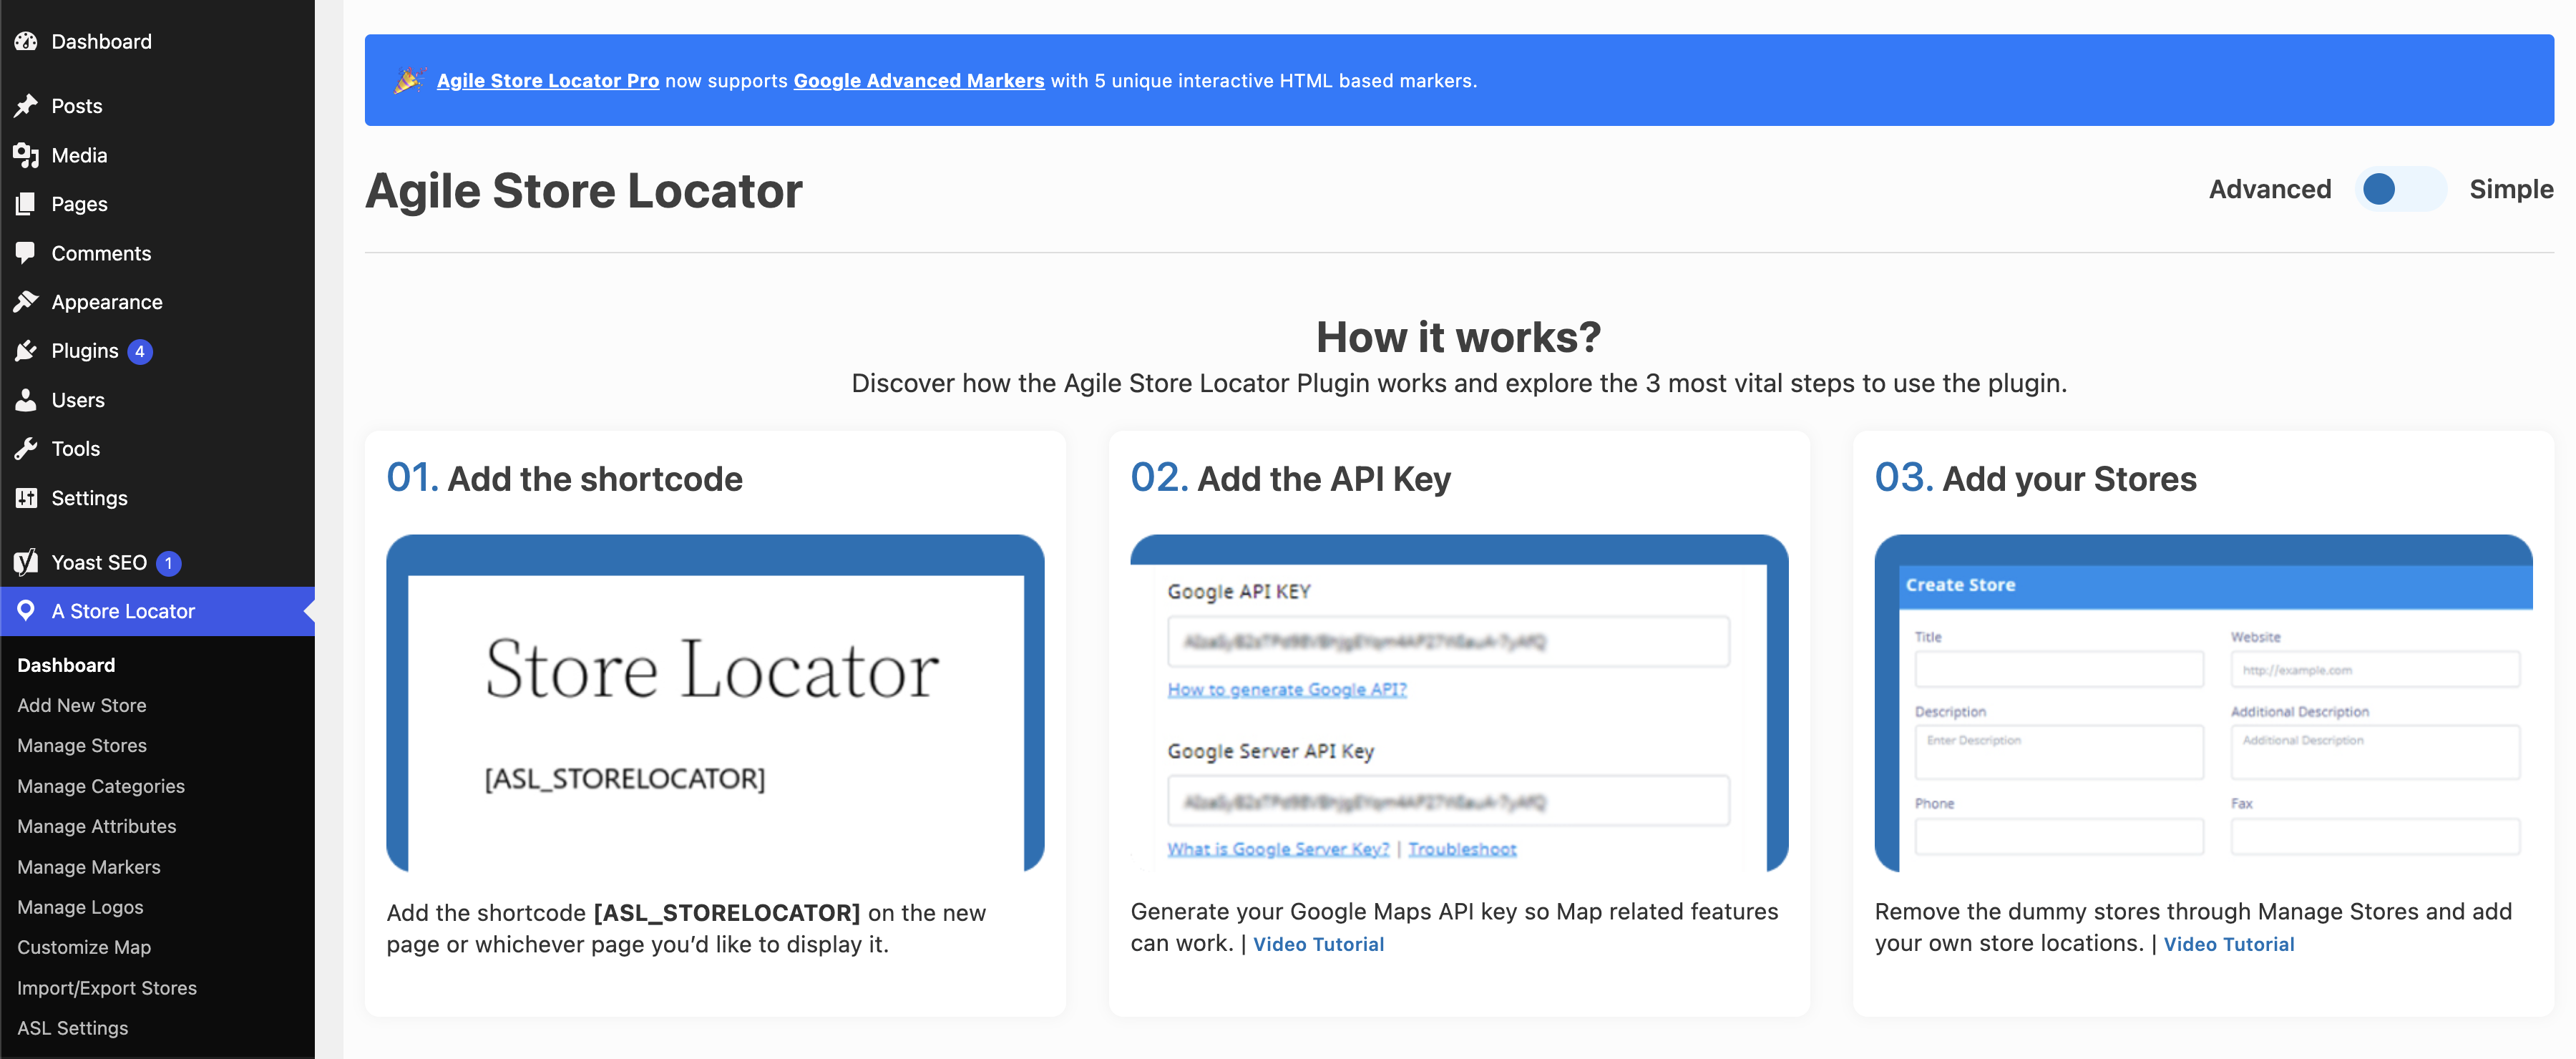
Note: If you need any additional styling or icon changes please reach out to the Fuzion Digital Web team in order for assistance. These changes are a bit more technical and can change how the Store Locator behave/look.
1.2. Adding a new store
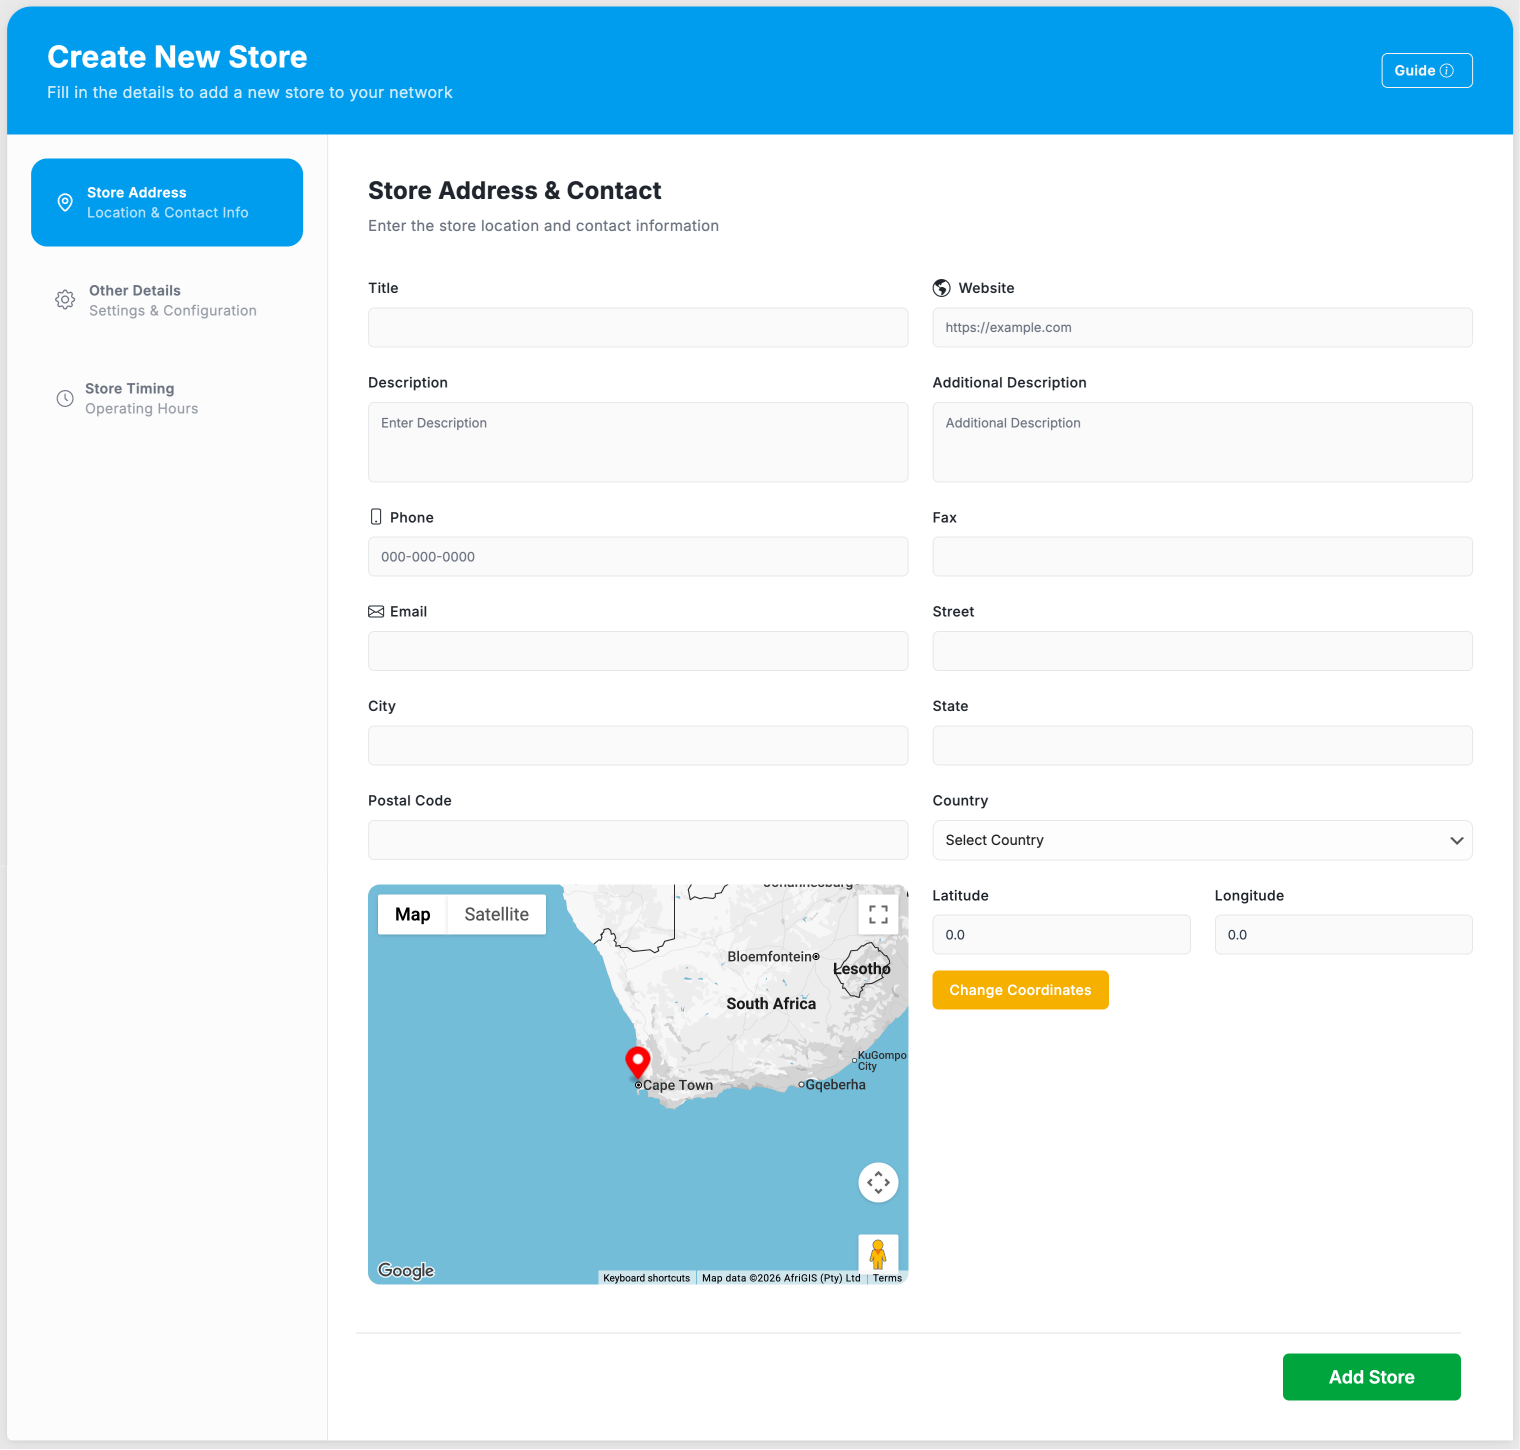
Adding a new store on your Store Locator is easy, simply navigate to 'Add New Store' in the menu side bar on your WordPress dashboard and a new window will load. The fields in this window aren't all required, and most fields are tailored to your website Store Locator requirements. Some fields are custom which can be found in the 'Other Details' tab on this form.
The following fields are what we found to be important and improves user experience so it's important to fill these:
- Title: This can be the store's title or address depending on how you want to display it's name on your map.
- Website: If this store has it's own website, or have a dedicated page on your website you want to link to, be sure to fill this in with the stores website or page URL.
- Phone: Quick call links visible on your map.
- Email: Quick email links visible on your map.
- Street: The store's street address.
- City: The city in which the store is located.
- State: The province the store is located.
- Postal Code: The area code of that store location.
- Country: Select the country the store is located.
- Latitude & Longitude: Map coordinates for the store to show the postion of the store on the map.
Tip: For the best results try to keep your store title align with your Google My Business listing on Google Maps.
1.3. Adding additional information to a new store
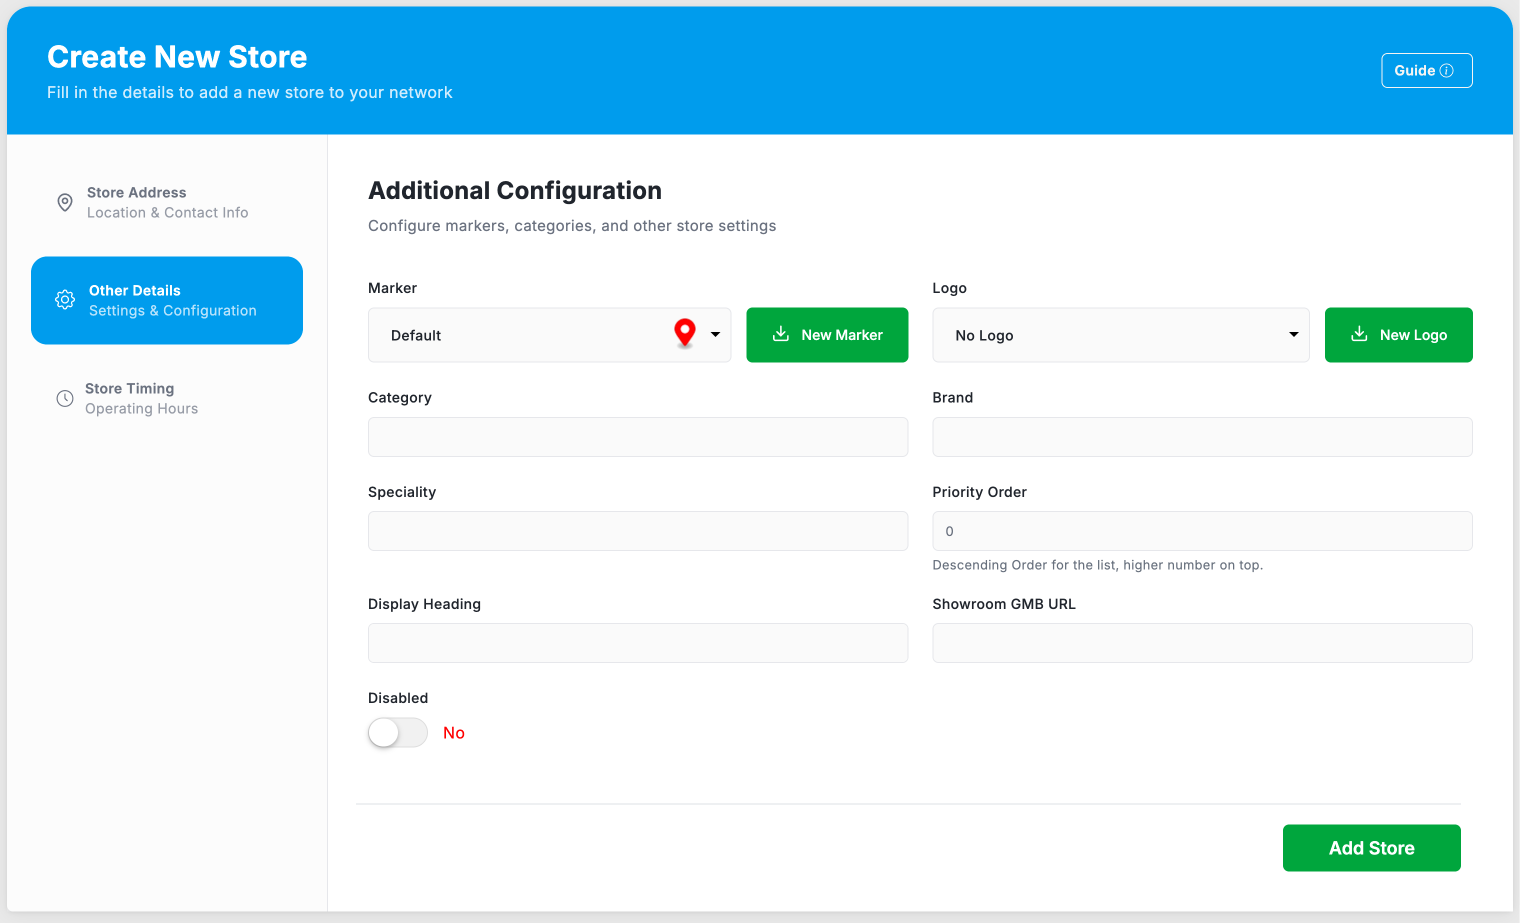
Depending on how your store locator was configured, some fields in the 'Other Details' tab can be custom and you should reach out to Fuzion Digital Web team in order to get the necessary information for the custom fields. However the standard fields can be edited as follow:
- Marker: This is how you would like this specific store's marker to show on the map. There are a range of markers to choose from. Custom markers can be uploaded however reach out to Fuzion Digital Web team for assistance.
- Logo: Upload the store's logo to display on the information card on the map.
- Category: This is for grouping stores if your stores have categories enabled.
- Disabled: If toggled on, the store will not show on the map. This is useful if your store is not active or available yet and you want to hide it on the map to the public.
1.4. Adding a new store operating times
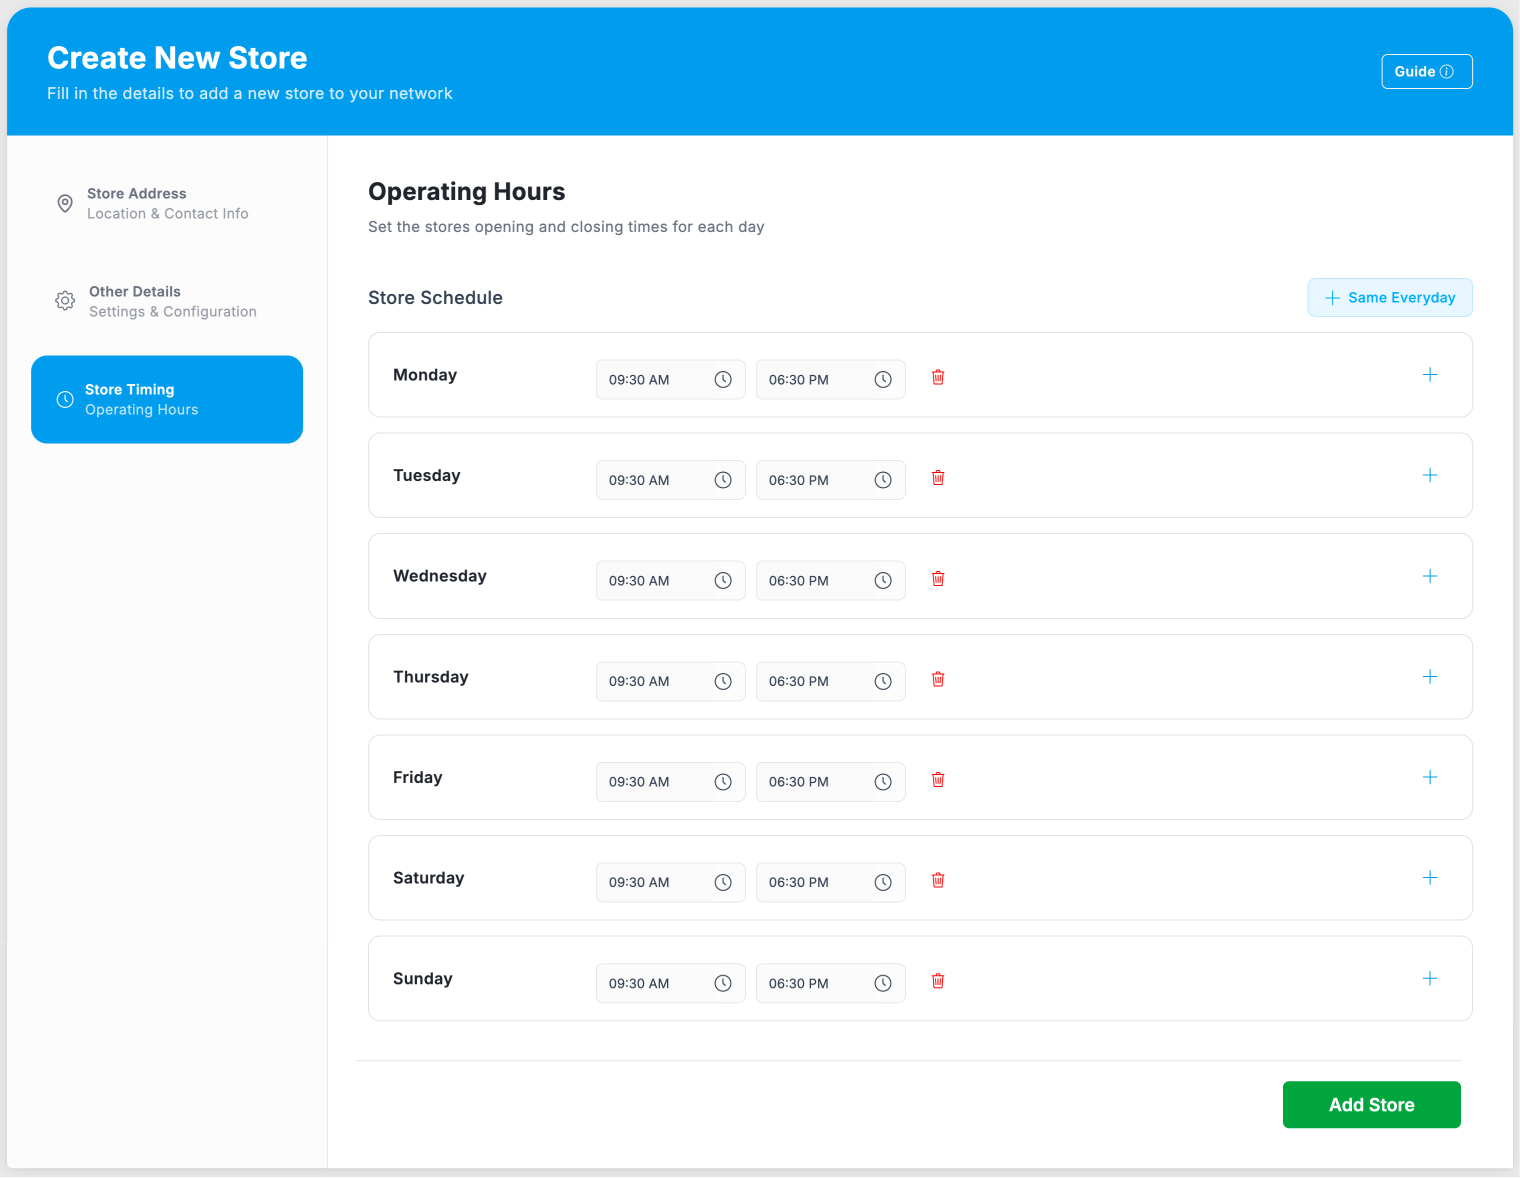
Store operating times are the time slots the store is open or operating. For example Monday to Friday the store is open from 08:00 - 17:00, Saturday the store is open from 08:00 - 14:00 and Sunday the store is closed. You can also add multiple hours for a specific day, e.g. Wednesday 08:00 - 12:00 + 14:00 - 17:00.
Important!
You cannot add operating or closed times for public holidays. This would custom so reach out to the Fuzion Digital Web team to incorporate this into your store information.
2. Manage Existing Stores
To edit an existing store listing, go to the Store Locator plugin in your WordPress dashboard and open the list of current stores under the 'Manage Stores' tab. From there, find the store you want to update, click to edit it, and make any necessary changes to the store name, address, contact details, or other location information.
You can easily search by store title, address, email, and many more as a filter to find the store you want to edit. If you have created a new store and added the store, you can still go back and edit filling in missing details.
Note: Always check the Store Locator map on your front end to make sure the updated details are displaying correctly.
No comments to display
No comments to display