
Managing WooCommerce Products
This guide explains how to manage WooCommerce products in WordPress, including adding new products, editing existing product details, and keeping your store information up to date. It is designed to help you maintain accurate product listings and manage your online store efficiently.
1. Navigating your WooCommerce backend shop
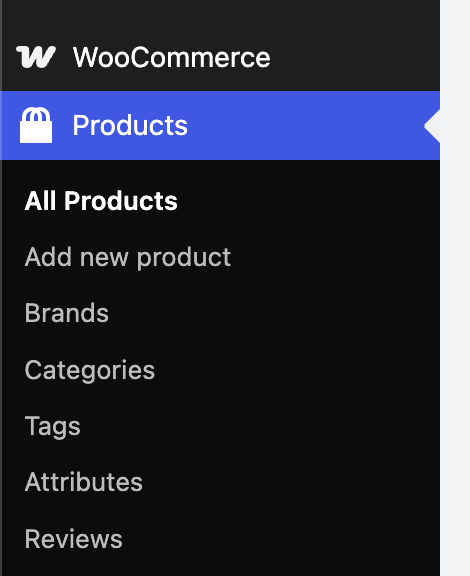
WooCommerce allows you full control on how you can manage your products and categorising them. Once logged into your WordPress website which has WooCommerce installed, navigate to WooCommerce plugin on the WordPress Dashboard. You can see an overview of all products in your online shop, wether published or unpublished by going to WooCommerce > All Products.
1.1. Searching and filtering products
Once on the products overview you can use the filter bar to easily find the products you are looking for. You can filter by category, product type or status. You can also search products by it's title, SKU (Stock/Product Code), or product content/description/specifications if available.
Note: If you have a custom build WooCommerce store your filters will be more granular based on your products and which filters are available to you.

1.2. Quick editing products
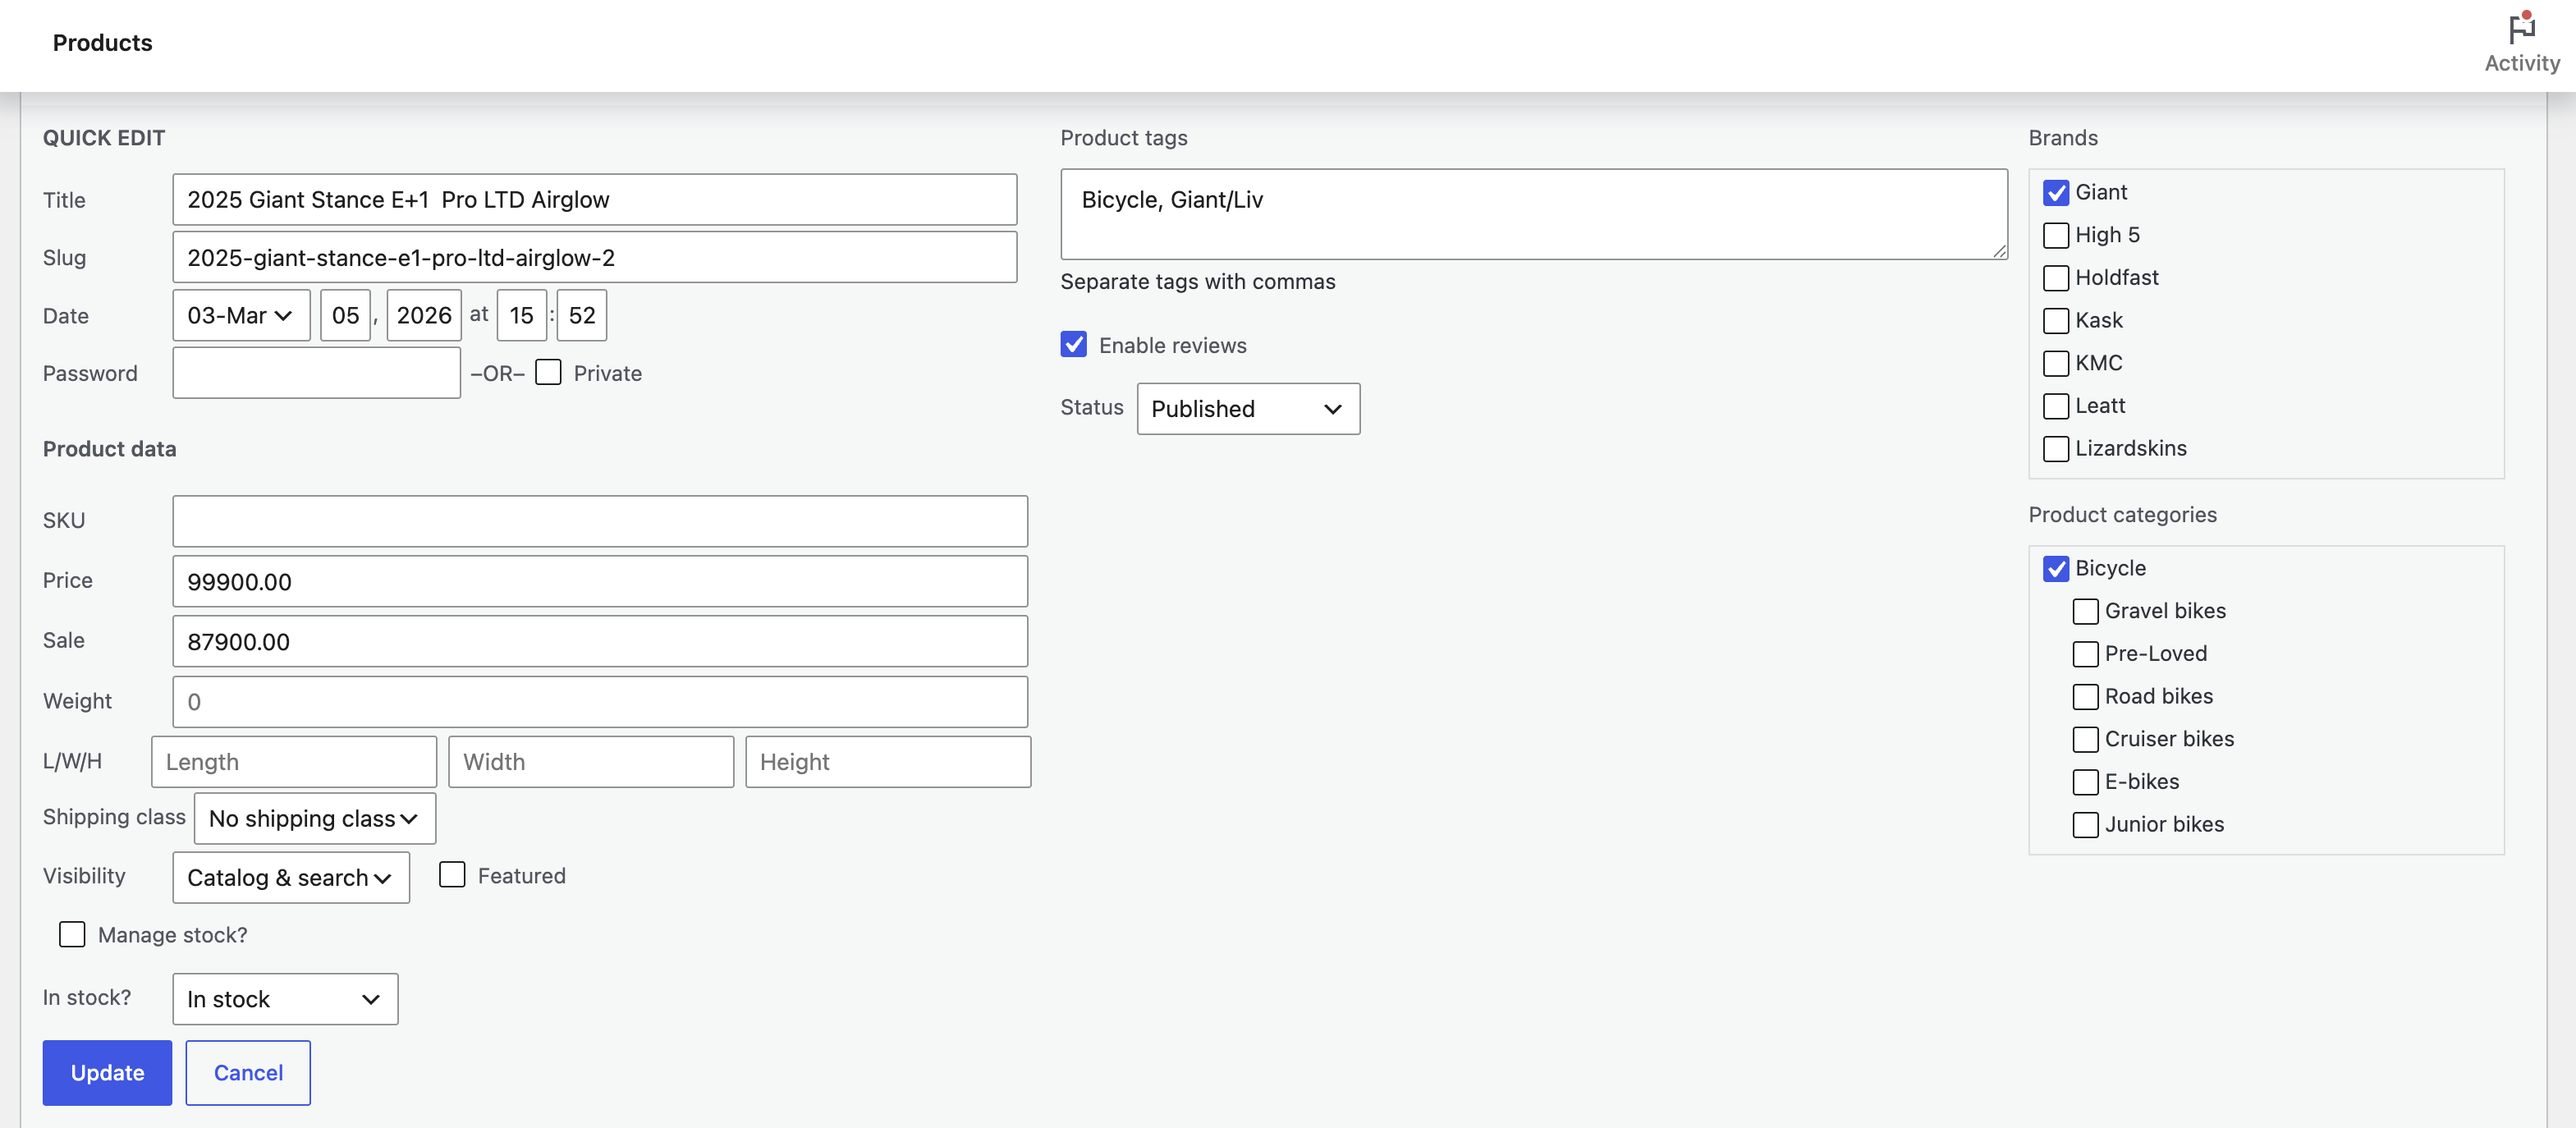
For fast individual product changes you can quick edit products from the summary page. Simply hover over the product and more options underneath the title will appear. Select 'Quick Edit' and the product you have selected will show the top level information to quick edit.
You can easily edit the product title, price, sale price, category, brand, visibility, tags and status. This is handy if you quickly want to make changes instead of opening the full product information. For image/gallery changes you will need to edit the product normally.
1.3. Bulk editing products
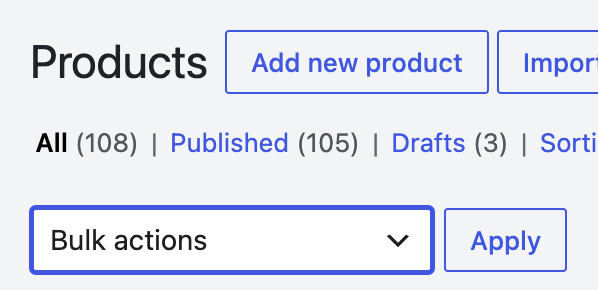
On the summary view you can also bulk edit a list of products you select. This is useful if you want to move a group of products into a specific category. You first need to select the range products by selecting the checkbox on the left, then at the top on the filter bar there is a 'Bulk actions' selection dropdown where you can select 'Bulk edit' or 'Move to bin'.
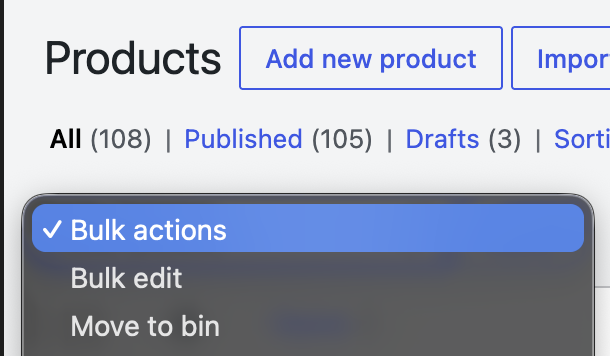
By selecting 'Bulk edit' as before a list of all the bulk edit options will appear also showing the selection of products it is bulk editing. Here you have more limited options however just enough to manage a group of products, wether it is to group them into a new category, adding tags, un-publishing products or increase/decrease pricing by a specific percentage. This will only change all of the selected products once you select the 'Update' button.
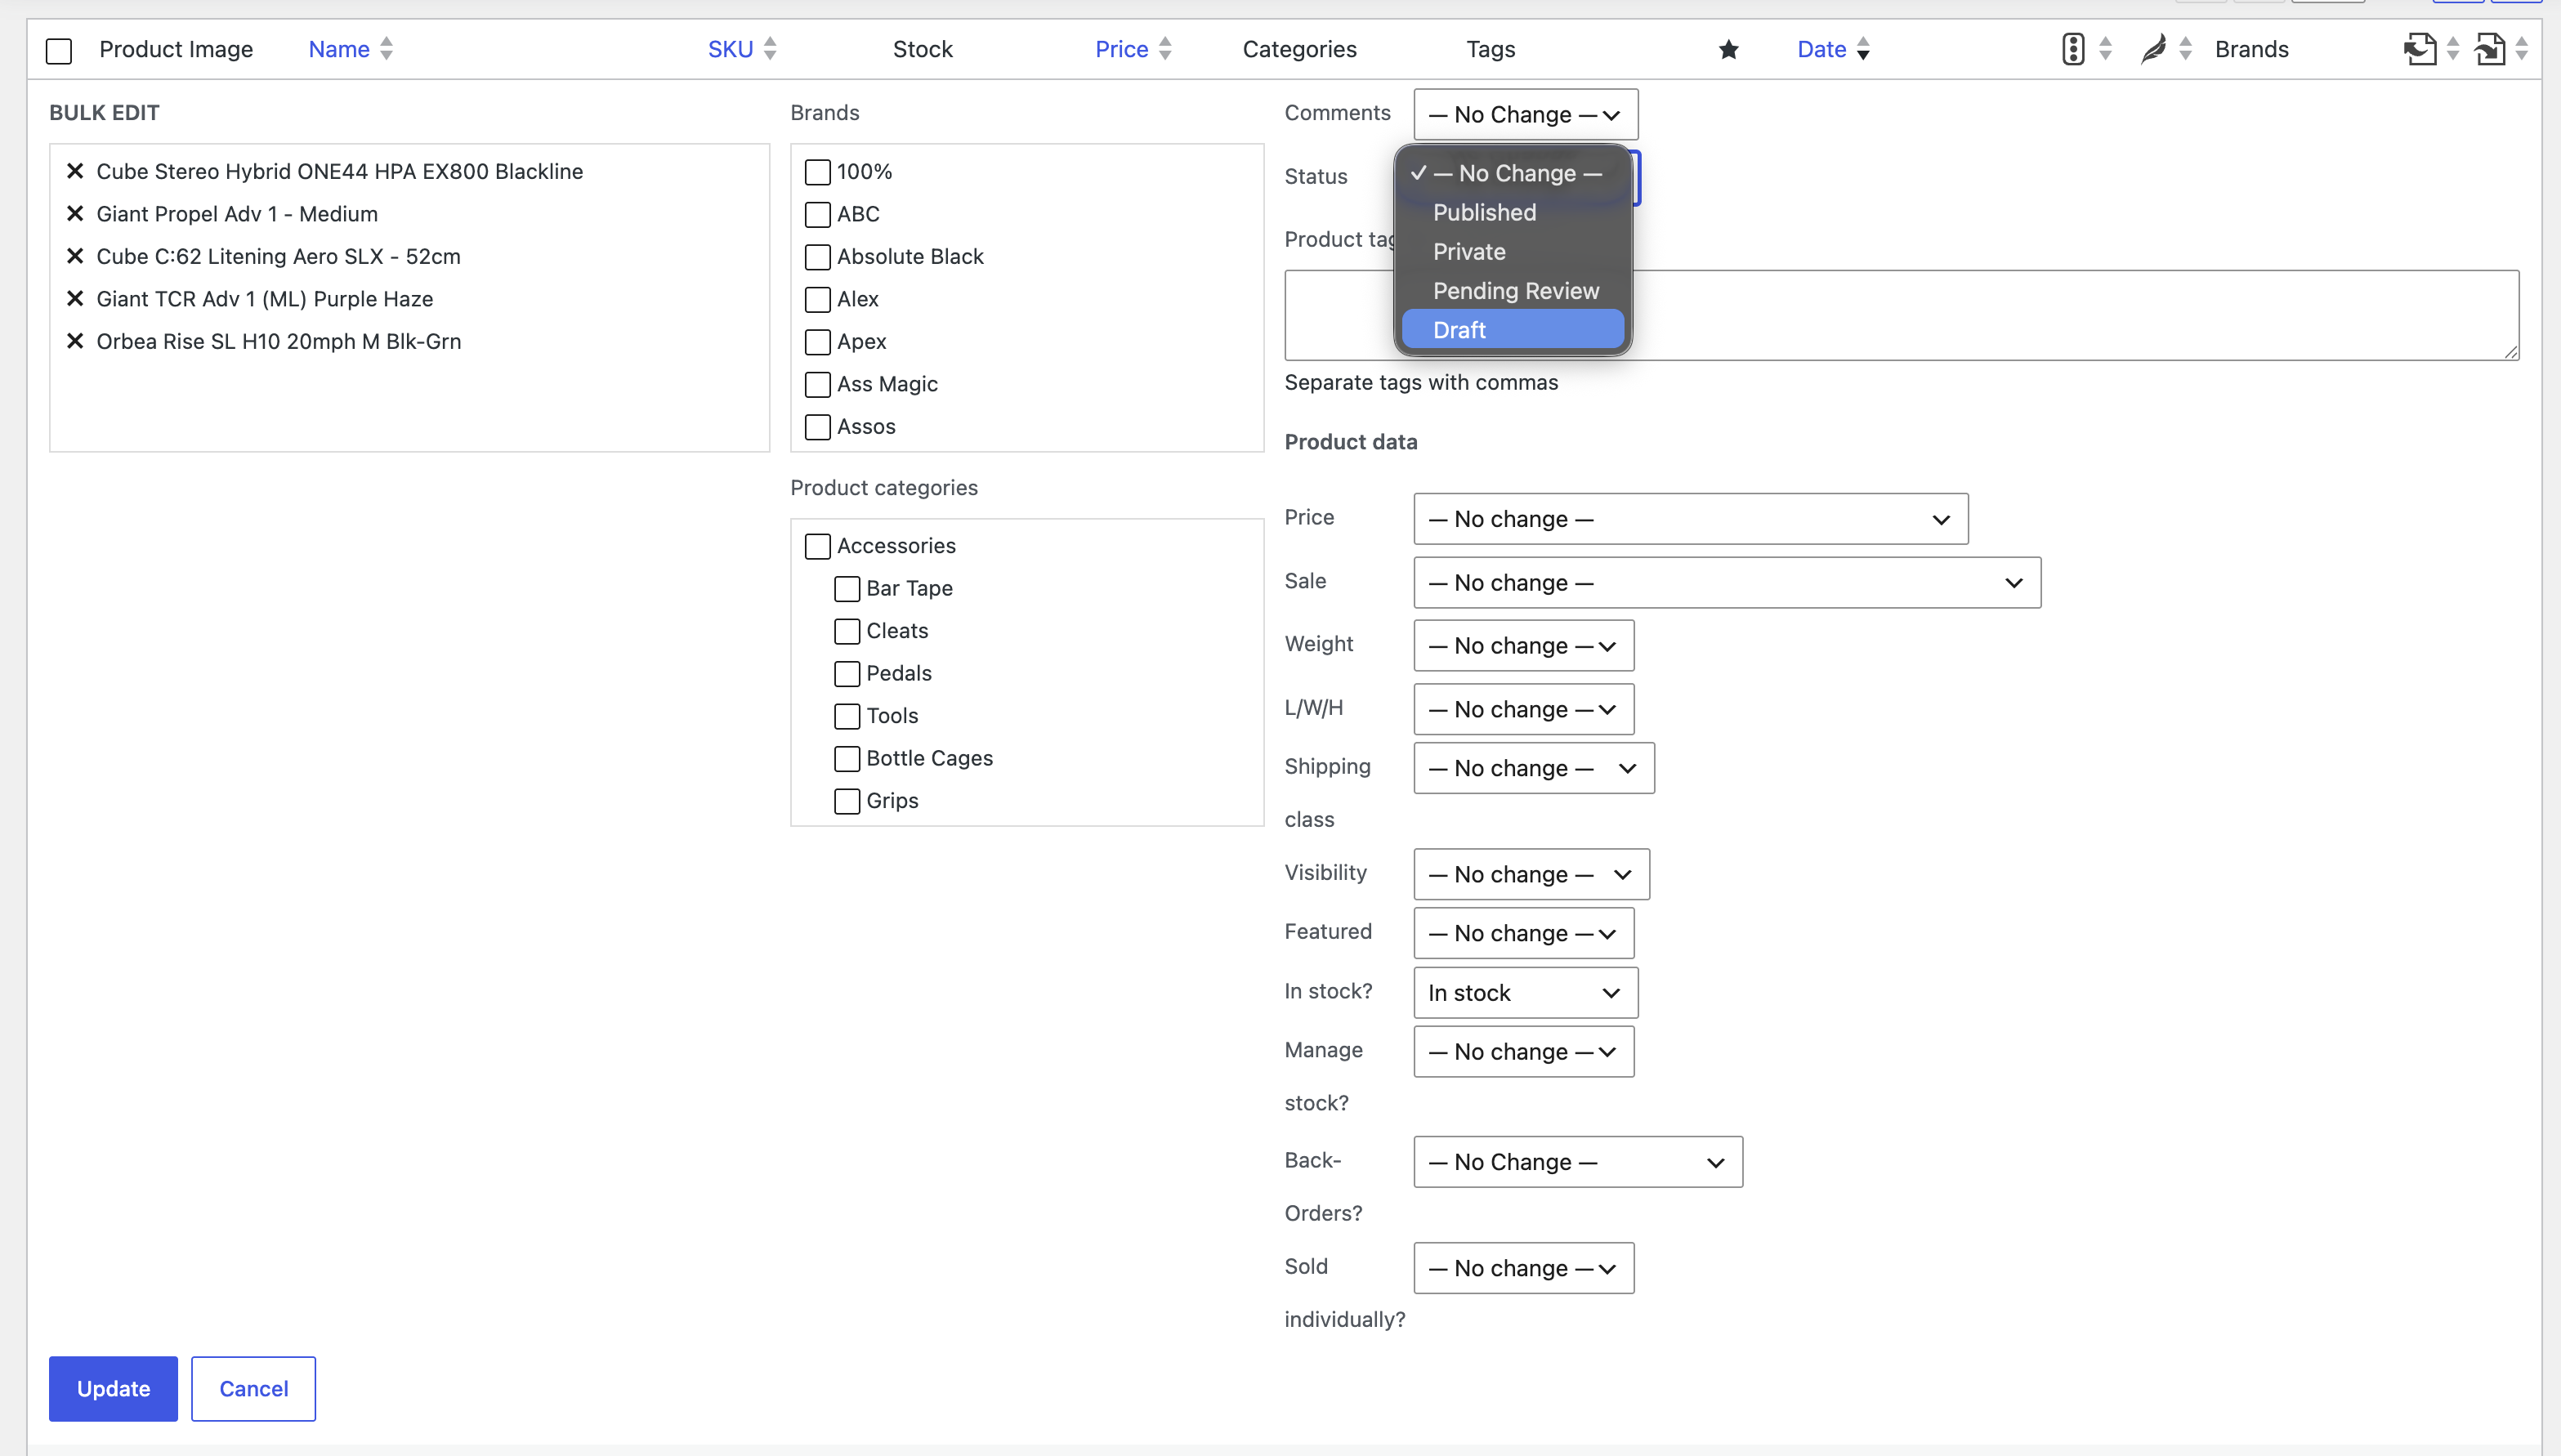
Important!
Once you changed these in bulk you cannot revert this change so be careful when using this feature and only use it if you intent to either move products into other categories, adding tags or un-publishing making the products drafts.
2. Edit a single product
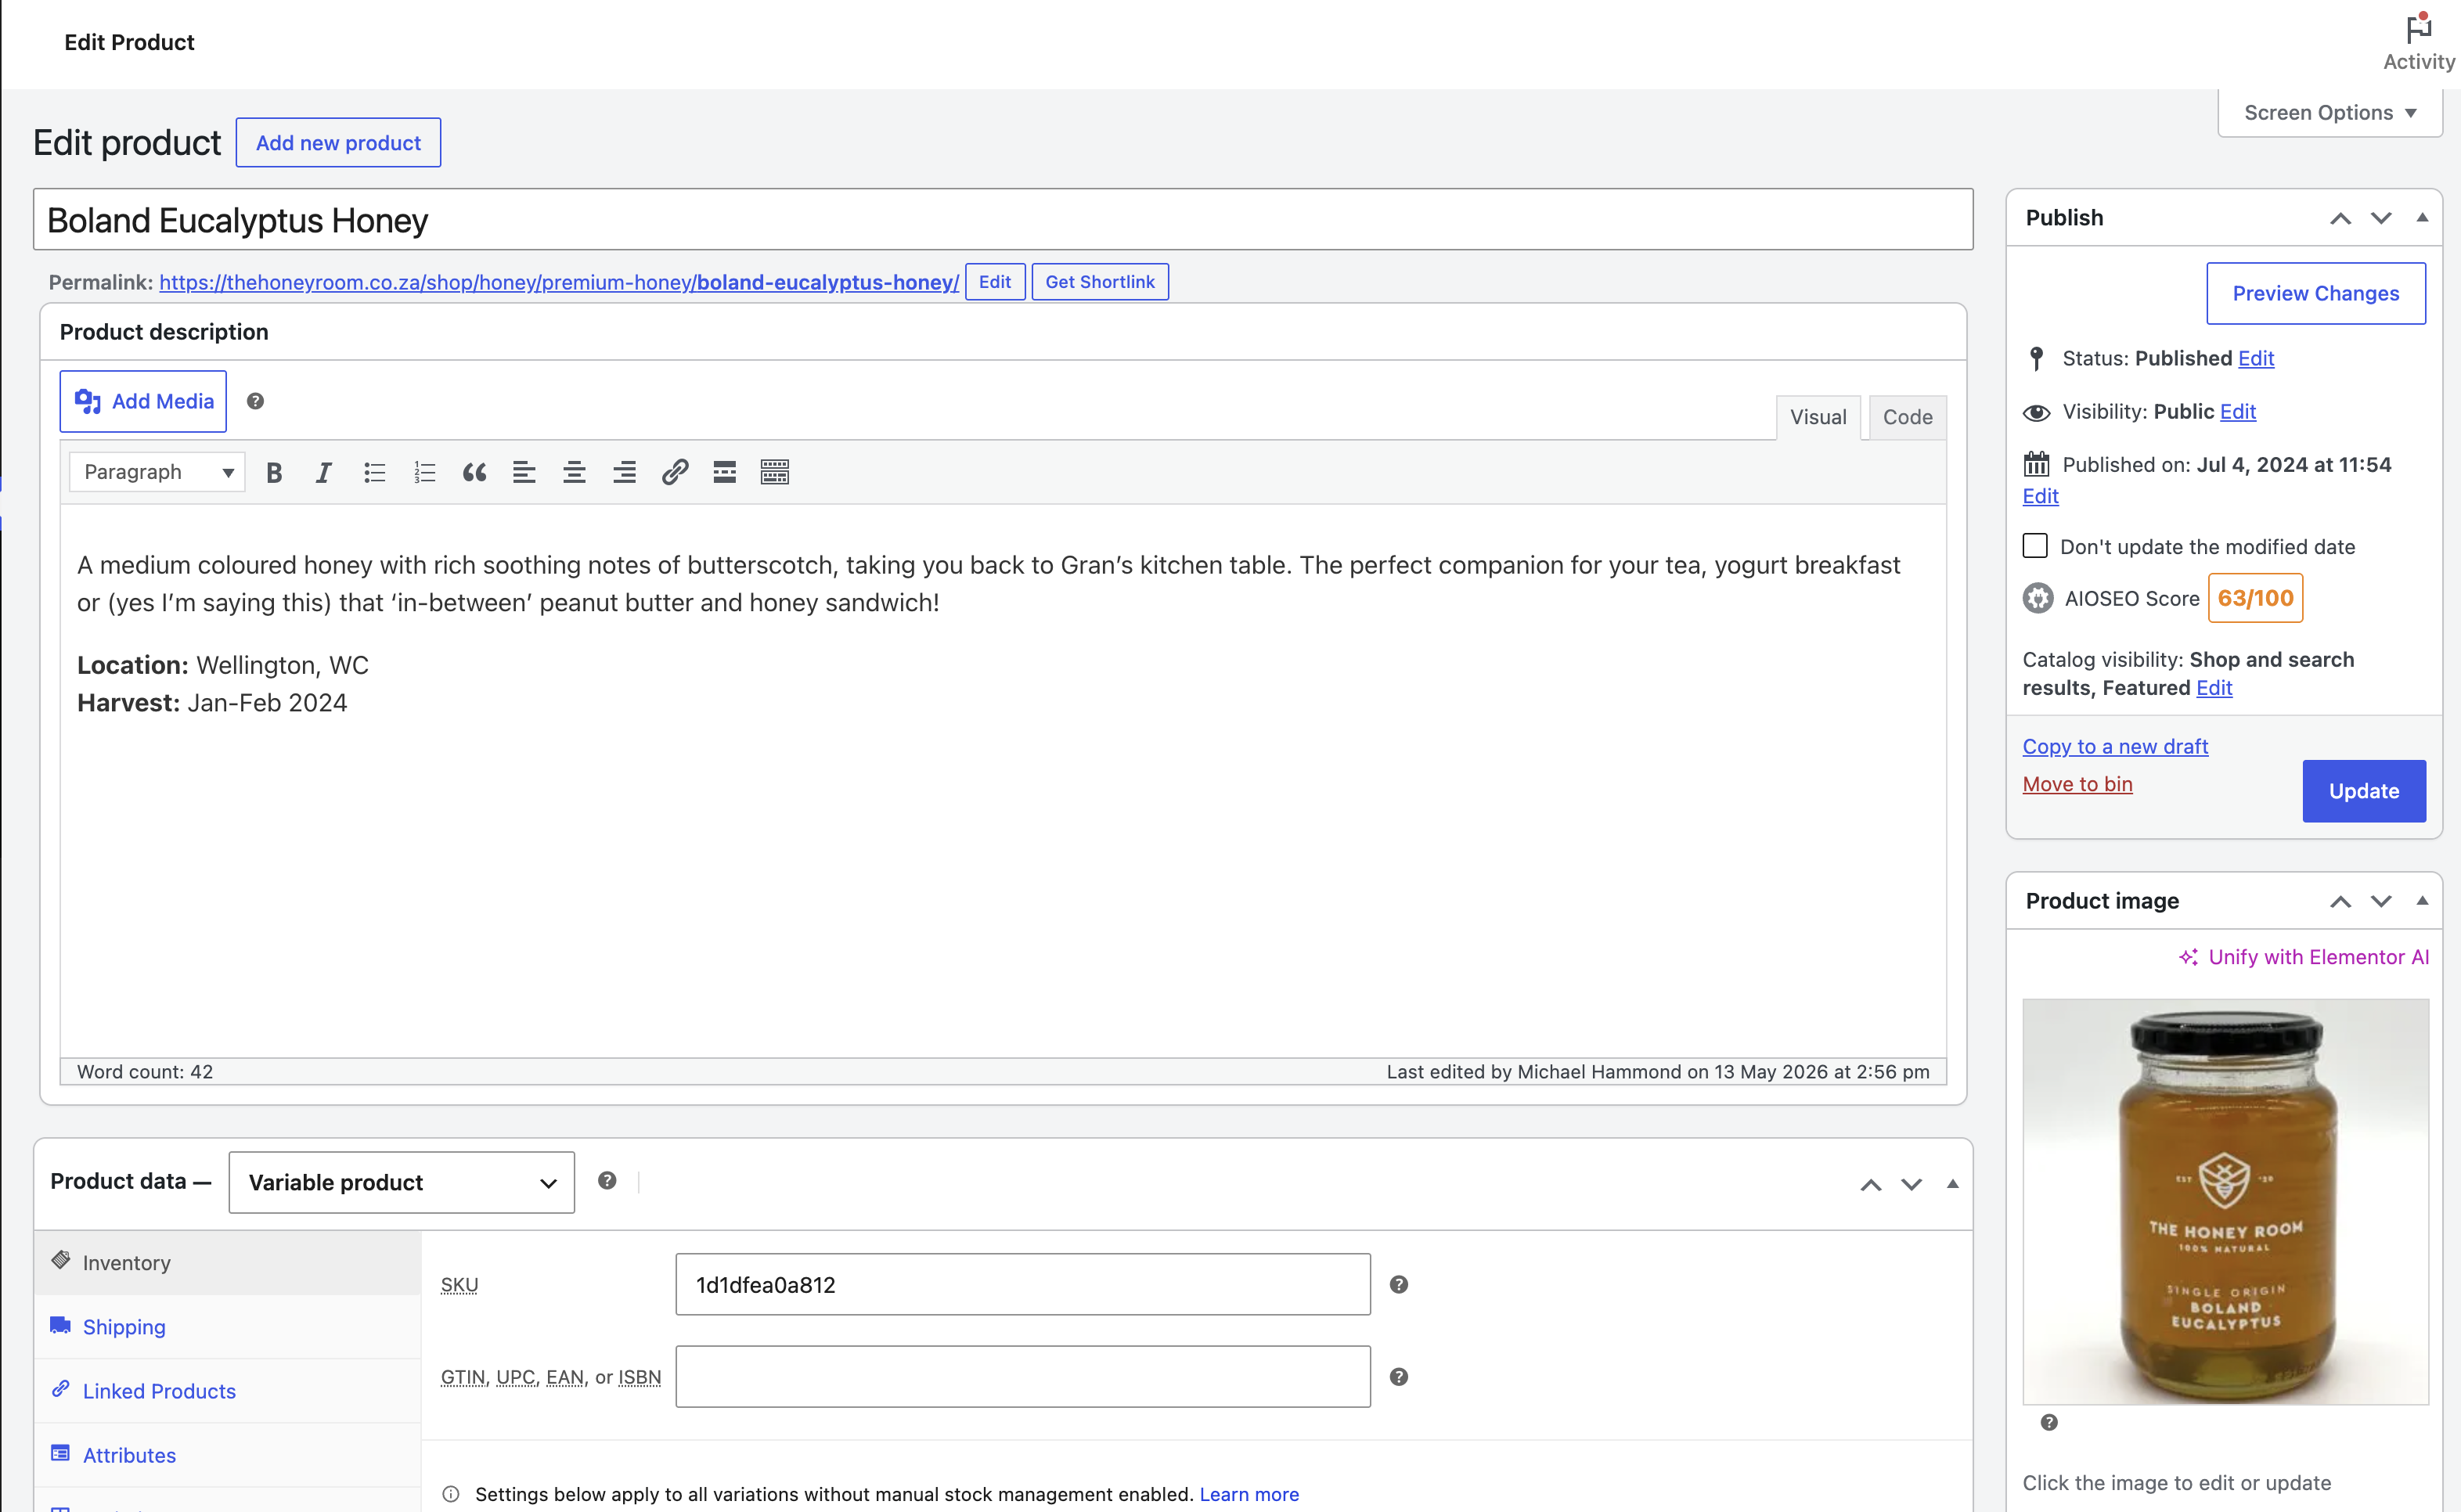
Unlike quick edit on the summary view, if you want to have more control on your product details such as the description, product images, and more you can simply click on the product title or edit which will open the full product editor for that specific product. All products on WooCommerce requires a SKU or what is known as a product stock code. This is so when a customer checks out the product on their cart you can track this and WooCommerce know which product the purchase is related to. SKU is based on your inventory management system, otherwise you can give it a unique name.
Note: SKU/Stock Codes are unique and can only be used a single time on individual products. No product on WooCommerce are allowed the same SKU code so be sure to keep them unique.
Editing a product is straight forward, you can add it's title, add a description, upload an image, adjust the price, categorise it and add purchase notes. See below how the editing interface will look. You can make edits and preview your changes before publishing the changes. Once you are happy you can select the 'Update' button at the top.
3. Edit a variant product
Product variations can get complex however if you follow the structure of a previous product it should be as easy as editing a standalone product without variations. Variations can be things like the size or colour of the product, and there is no limitations on how many variations you can add to a product. However the more option you add the more variants of the product you will need to create. In order to use variations you will need to change your product type from 'Simple product' to 'Variable product'.
3.1. Adding variations to a product
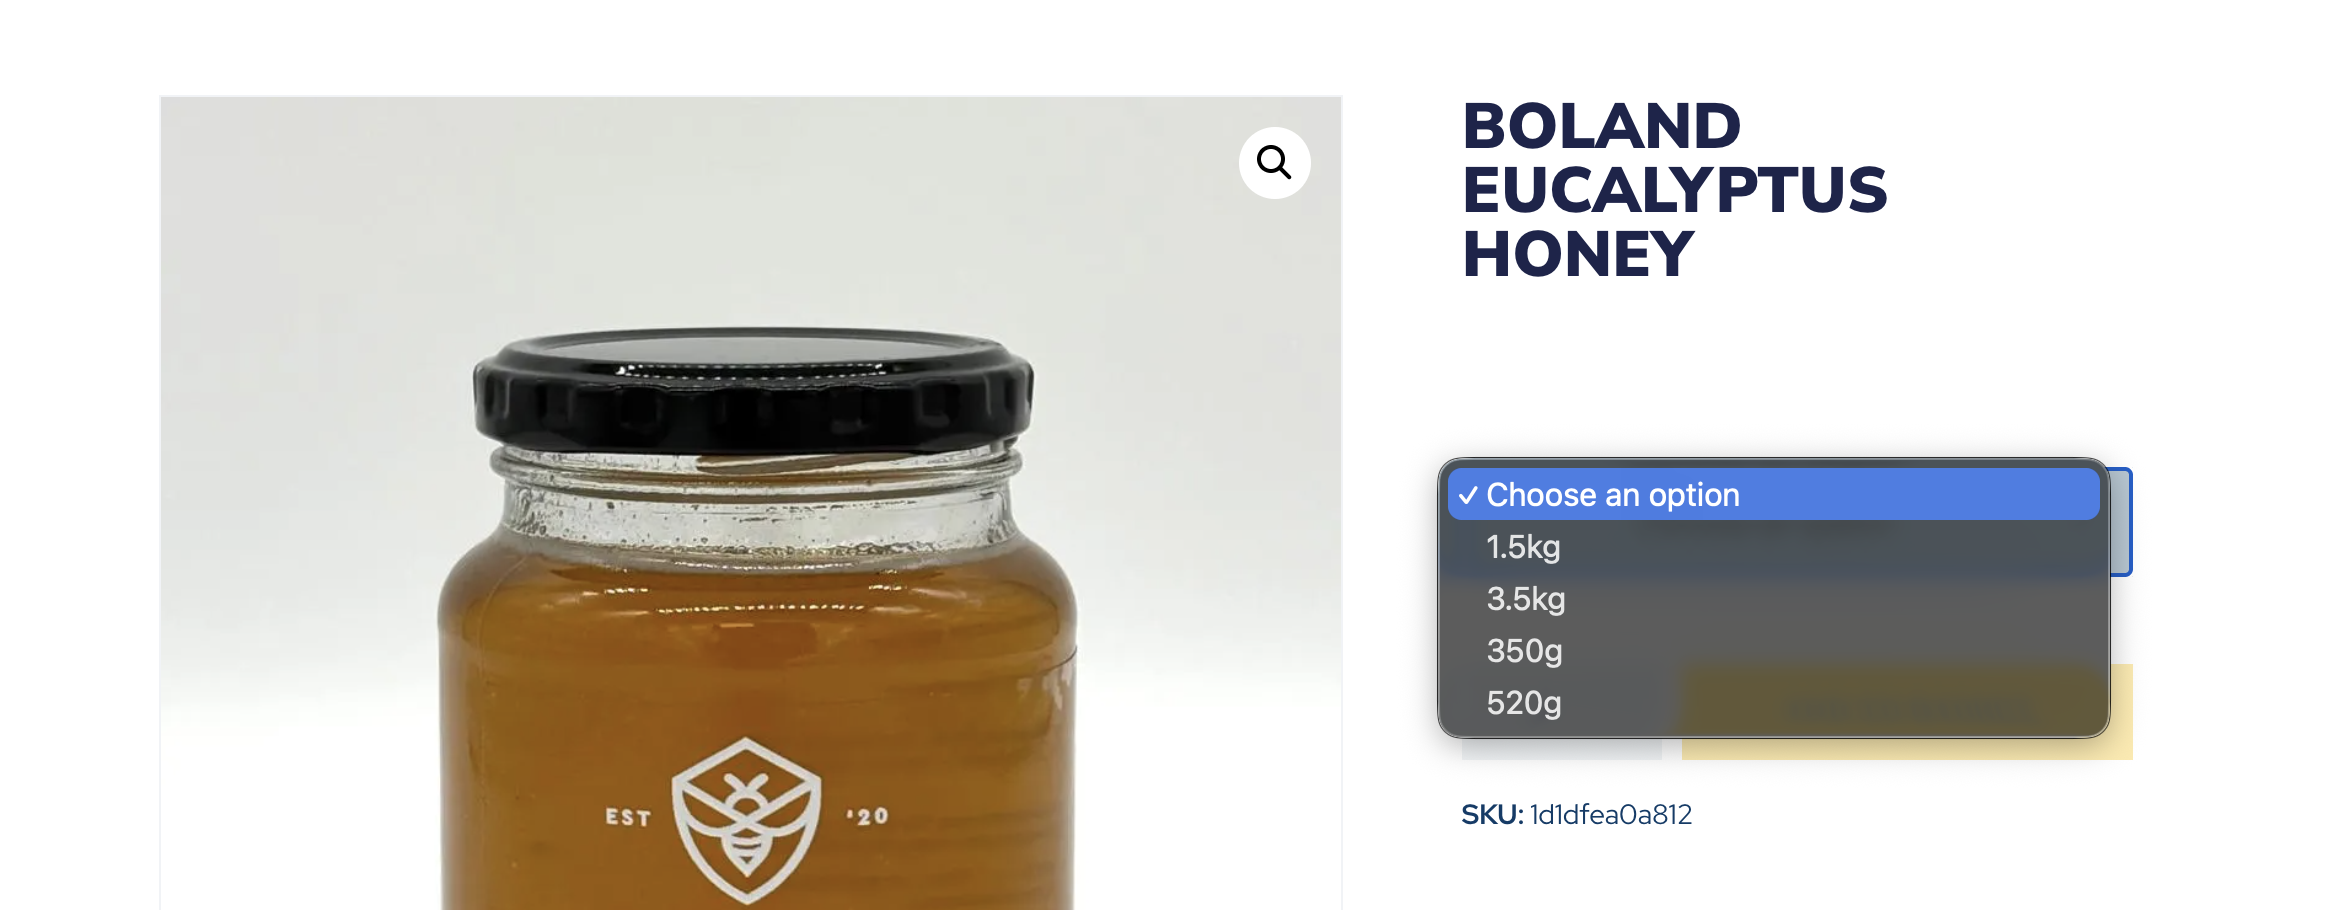
Here is an example of a product which has a size variation. First you will need to define the variant(s) by the 'attribute', in this case 'Size'. Attributes can be chosen from a list if they exist on your website, or you can create additional options by typing the option and selecting 'Create value'.
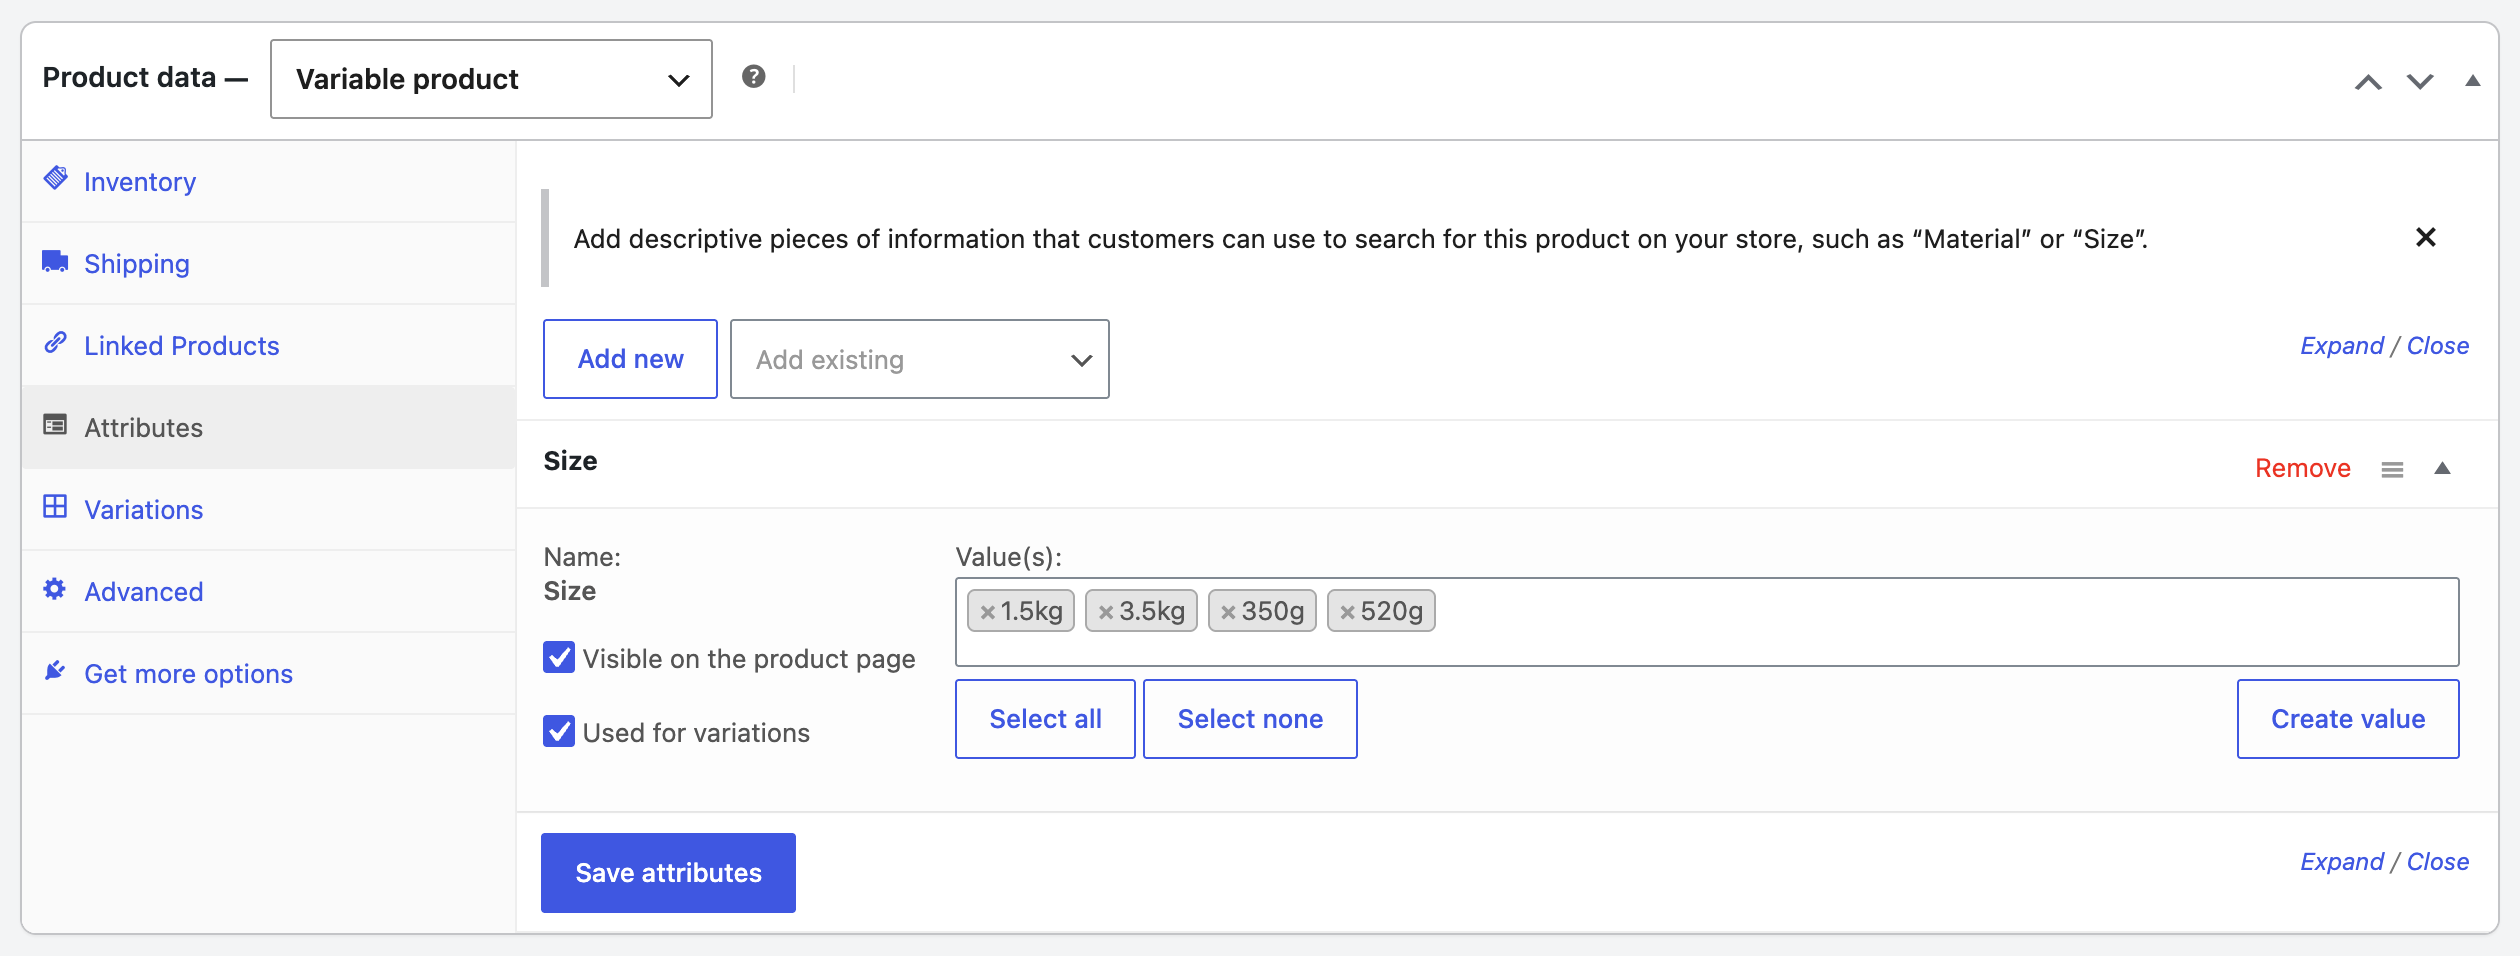
Again, you can add additional attributes, for example colour, material, etc. This will allow another variation option to add to your product. Ensure that 'Used for variations' is checked.
3.2. Configuring variants on a product
Once you've added your attributes you can open the Variations tab and start adding the product variants. WooCommerce has an option to generate the variations easily by selecting 'Generate variations'.
Important!
If you are adding additional variations on an existing product with variants please be advised to do it manually as generating new variations on an existing variant product will overwrite the existing variations.
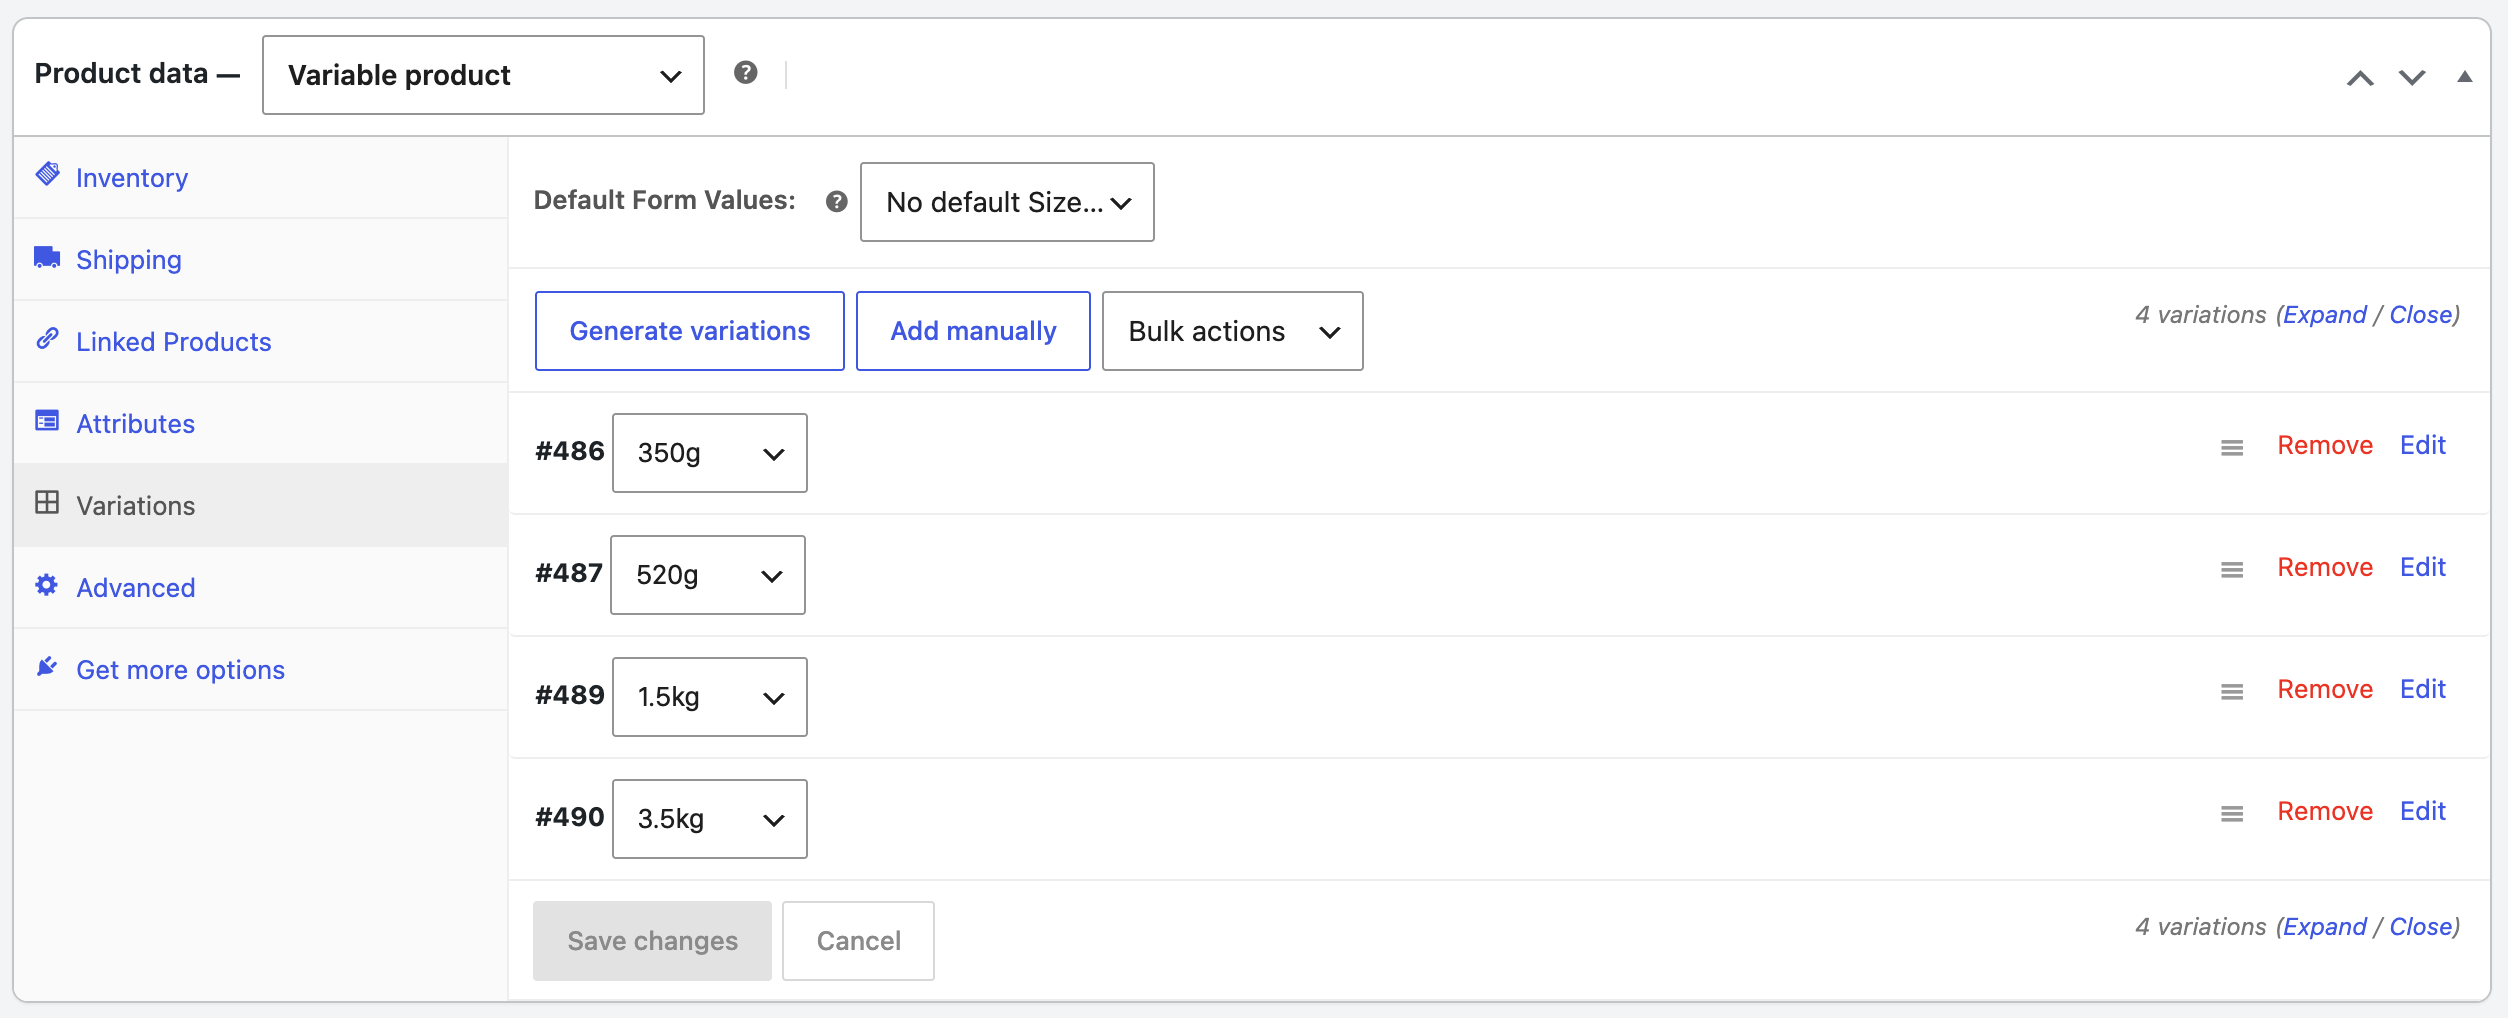
Variant products have all the same information as a simple product, however each variant needs to be configured with their own set of information once the user select it in the dropdown on your shop.
You can choose if you want to have a different image to display, the price to change, if the specific variation has a discounted price, wether it as additional information to display or if it's low on stock. Each variant can be edited manually and in the example shown the product size determines the price.
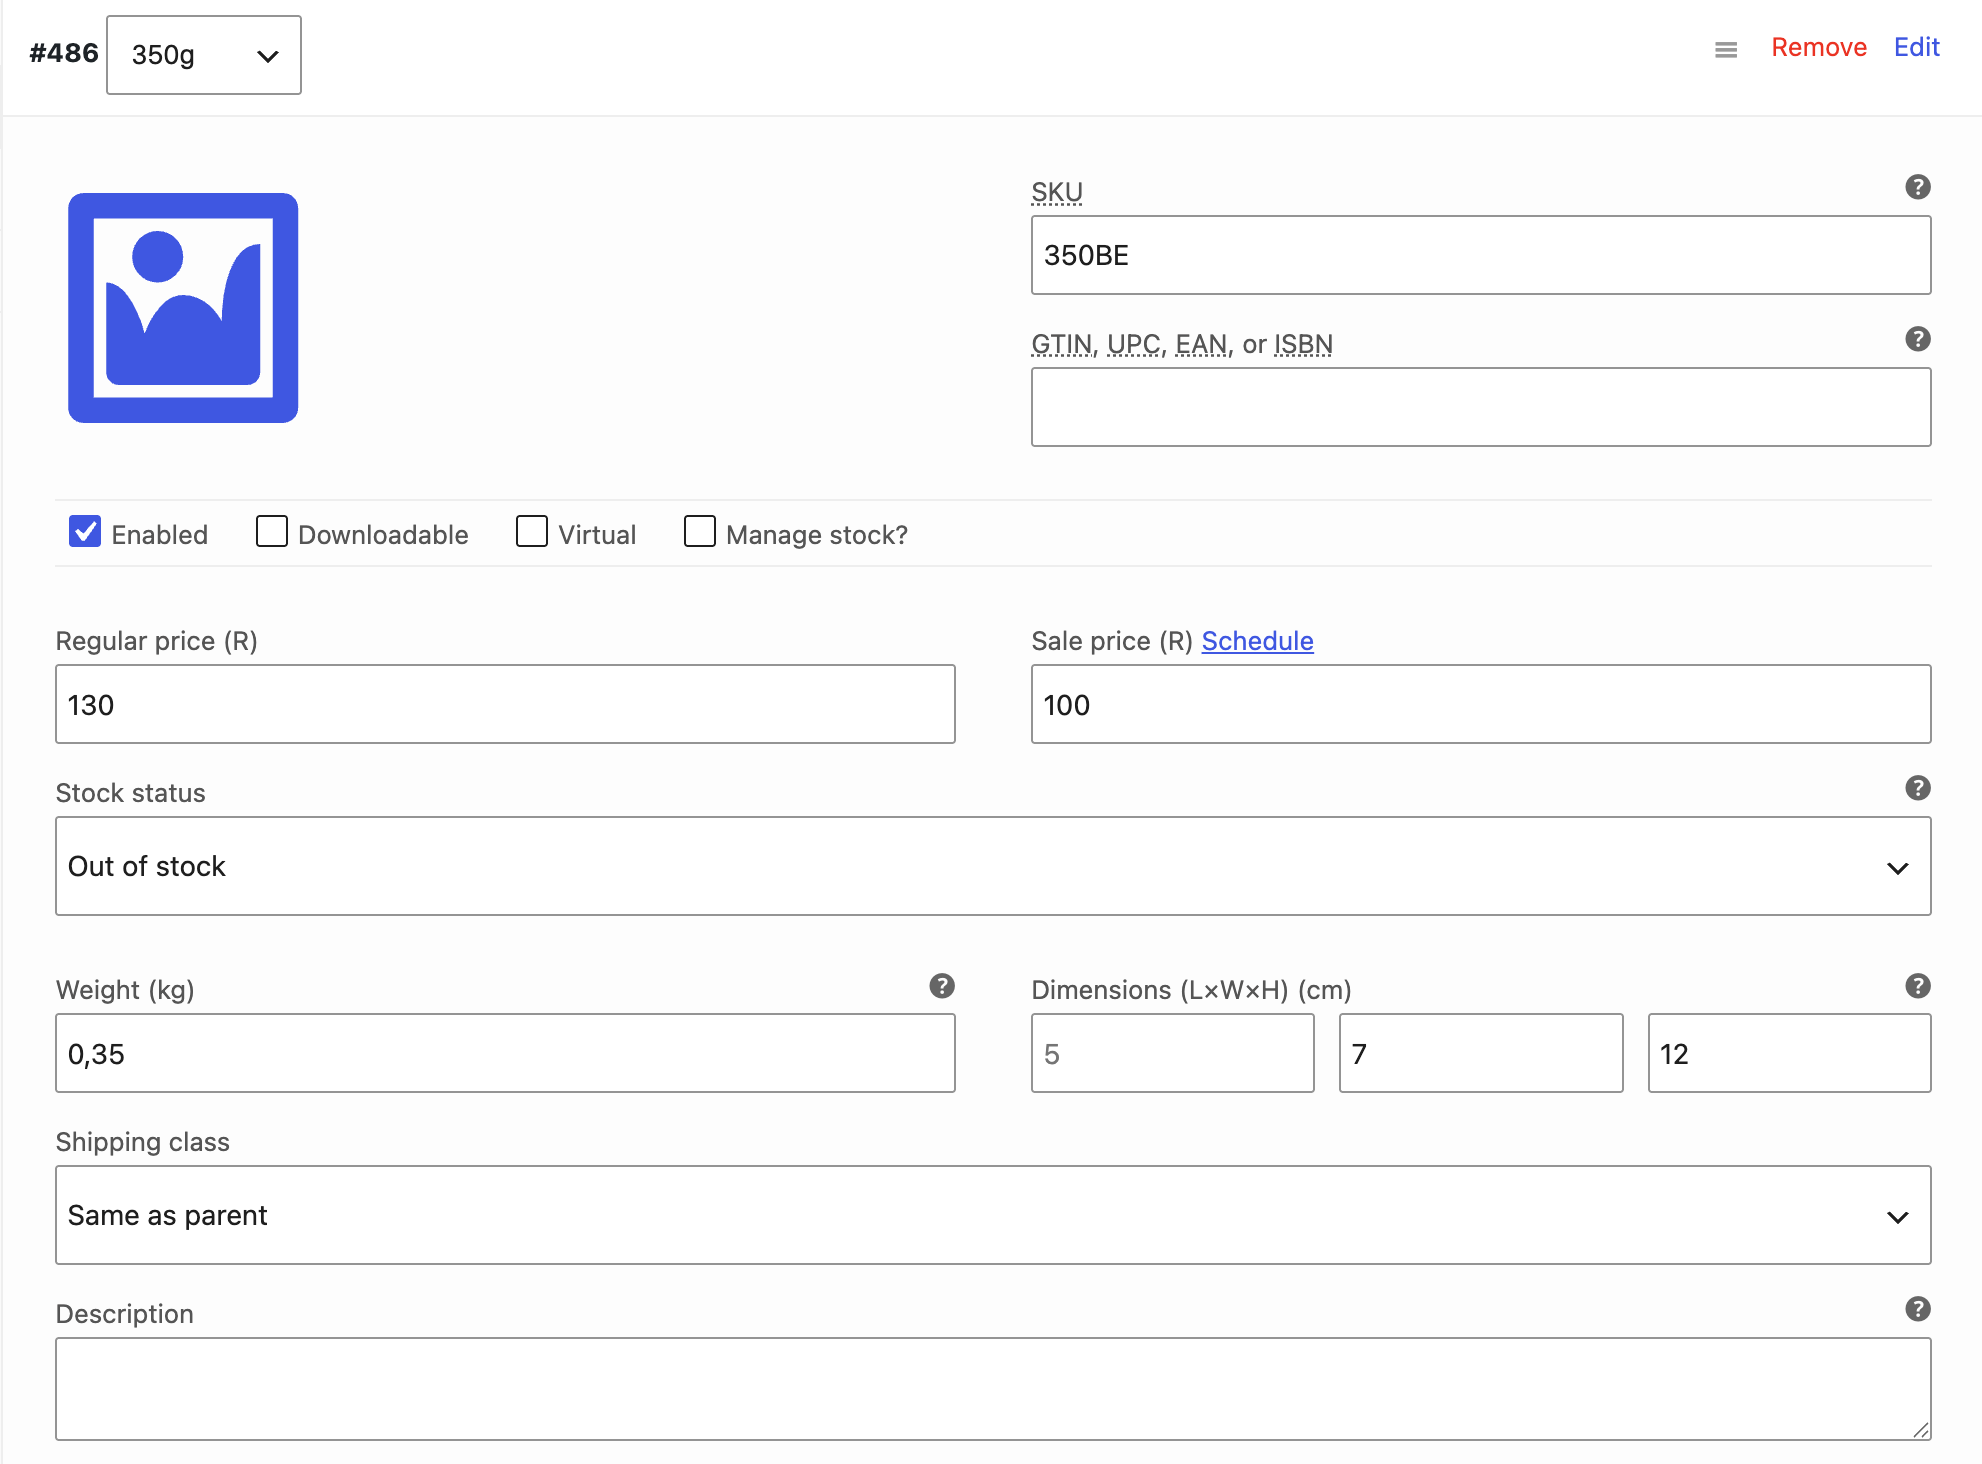
Note: You are not limited to the attributes you set and can remove variants manually by selecting 'Remove'. You can easily add them back by selecting 'Add manually' and select the variant.
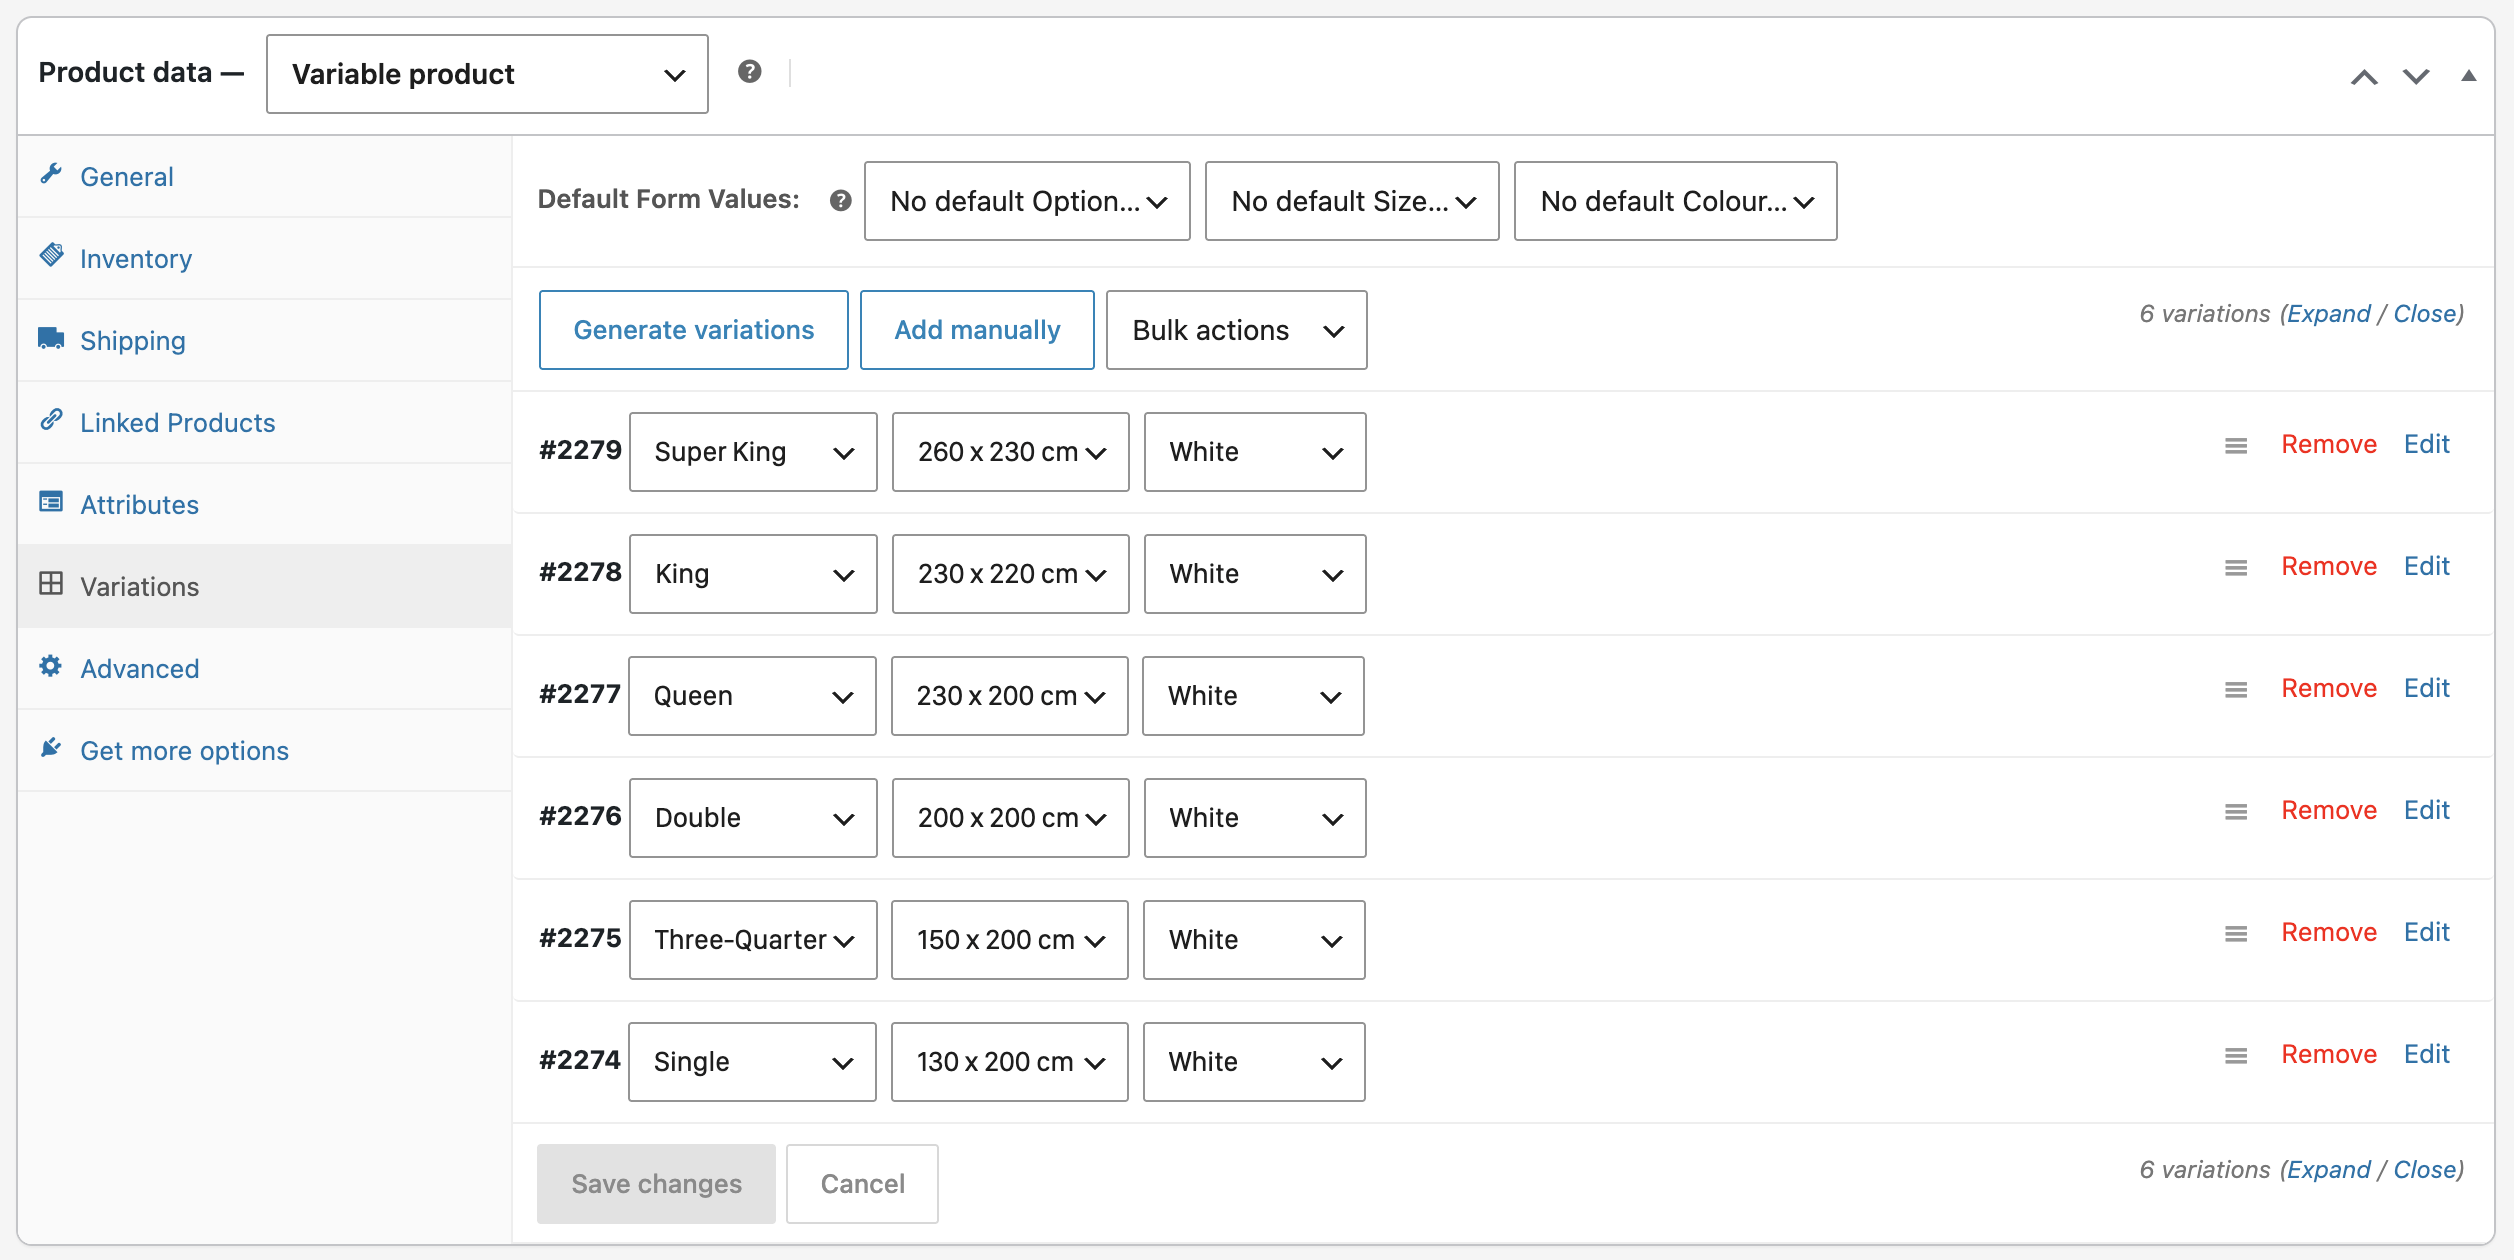
An example of a more comprehensive variation use case would be something like the following where a Pure Cotton Duvet Cover product has variants based on the Option, Size and Colour. If there were more colour options then there would be more variants of the product for the offered option and the size. The most popular use cases is size and colour, however this all depends on your product range and how it should be displayed to customers on your online store.
4. Displaying a product on your online store
If you've added a new product or edited an existing product ensure that the product is set to a category. With the initial product load from Fuzion Digital we aim to keep things neat and categorised from SEO purposes. So if your product is not displaying on your shop then you might have the following details missing:
- Check if your product have a price - most common mistake, products without pricing will not show on your shop.
- Check if your product have an unique SKU/Stock Code
- Ensure your product is in at least 1 category - we always add products to categories for grouping, SEO and important filters. If your product is in 'uncategorised' you will need to assign it a category in order to display on your shop.
- Check if your product status is 'Published' - Products with 'Draft' status will not show on your shop, it needs to be published.
- Check if your product visibility is set to 'Catalogue' or 'Catalogue & Search'.
If you need additional categories or guidance with how your products display on your online store, reach out to the Fuzion Digital Web team for assistance.
No comments to display
No comments to display